PhobGCC v2.0 Programming Guide
This is a guide to programming the teensy microcontroller on PhobGCC v2.0.
Tools
- A computer running Windows, MacOS, or Linux.
- A screwdriver for opening your controller (Tri-point is the stock screw, but some controllers may be built with Torx or Phillips).
- A data-capable micro-USB cable.
Controller Disassembly
Unplug and then open your controller by removing the six screws on the back located at the end of the handles, near the triggers, and behind the C-stick and D-pad. Pull the back shell off and lay it down. Carefully lift the board out of the shell and place the front shell down.
Downloading and Flashing The PhobGCC v2.0 Firmware
Go to the Releases section of the PhobGCC-SW Github and download the latest available firmware. For the PhobGCC v2.0 board, you will want to download the .uf2 file as shown below:

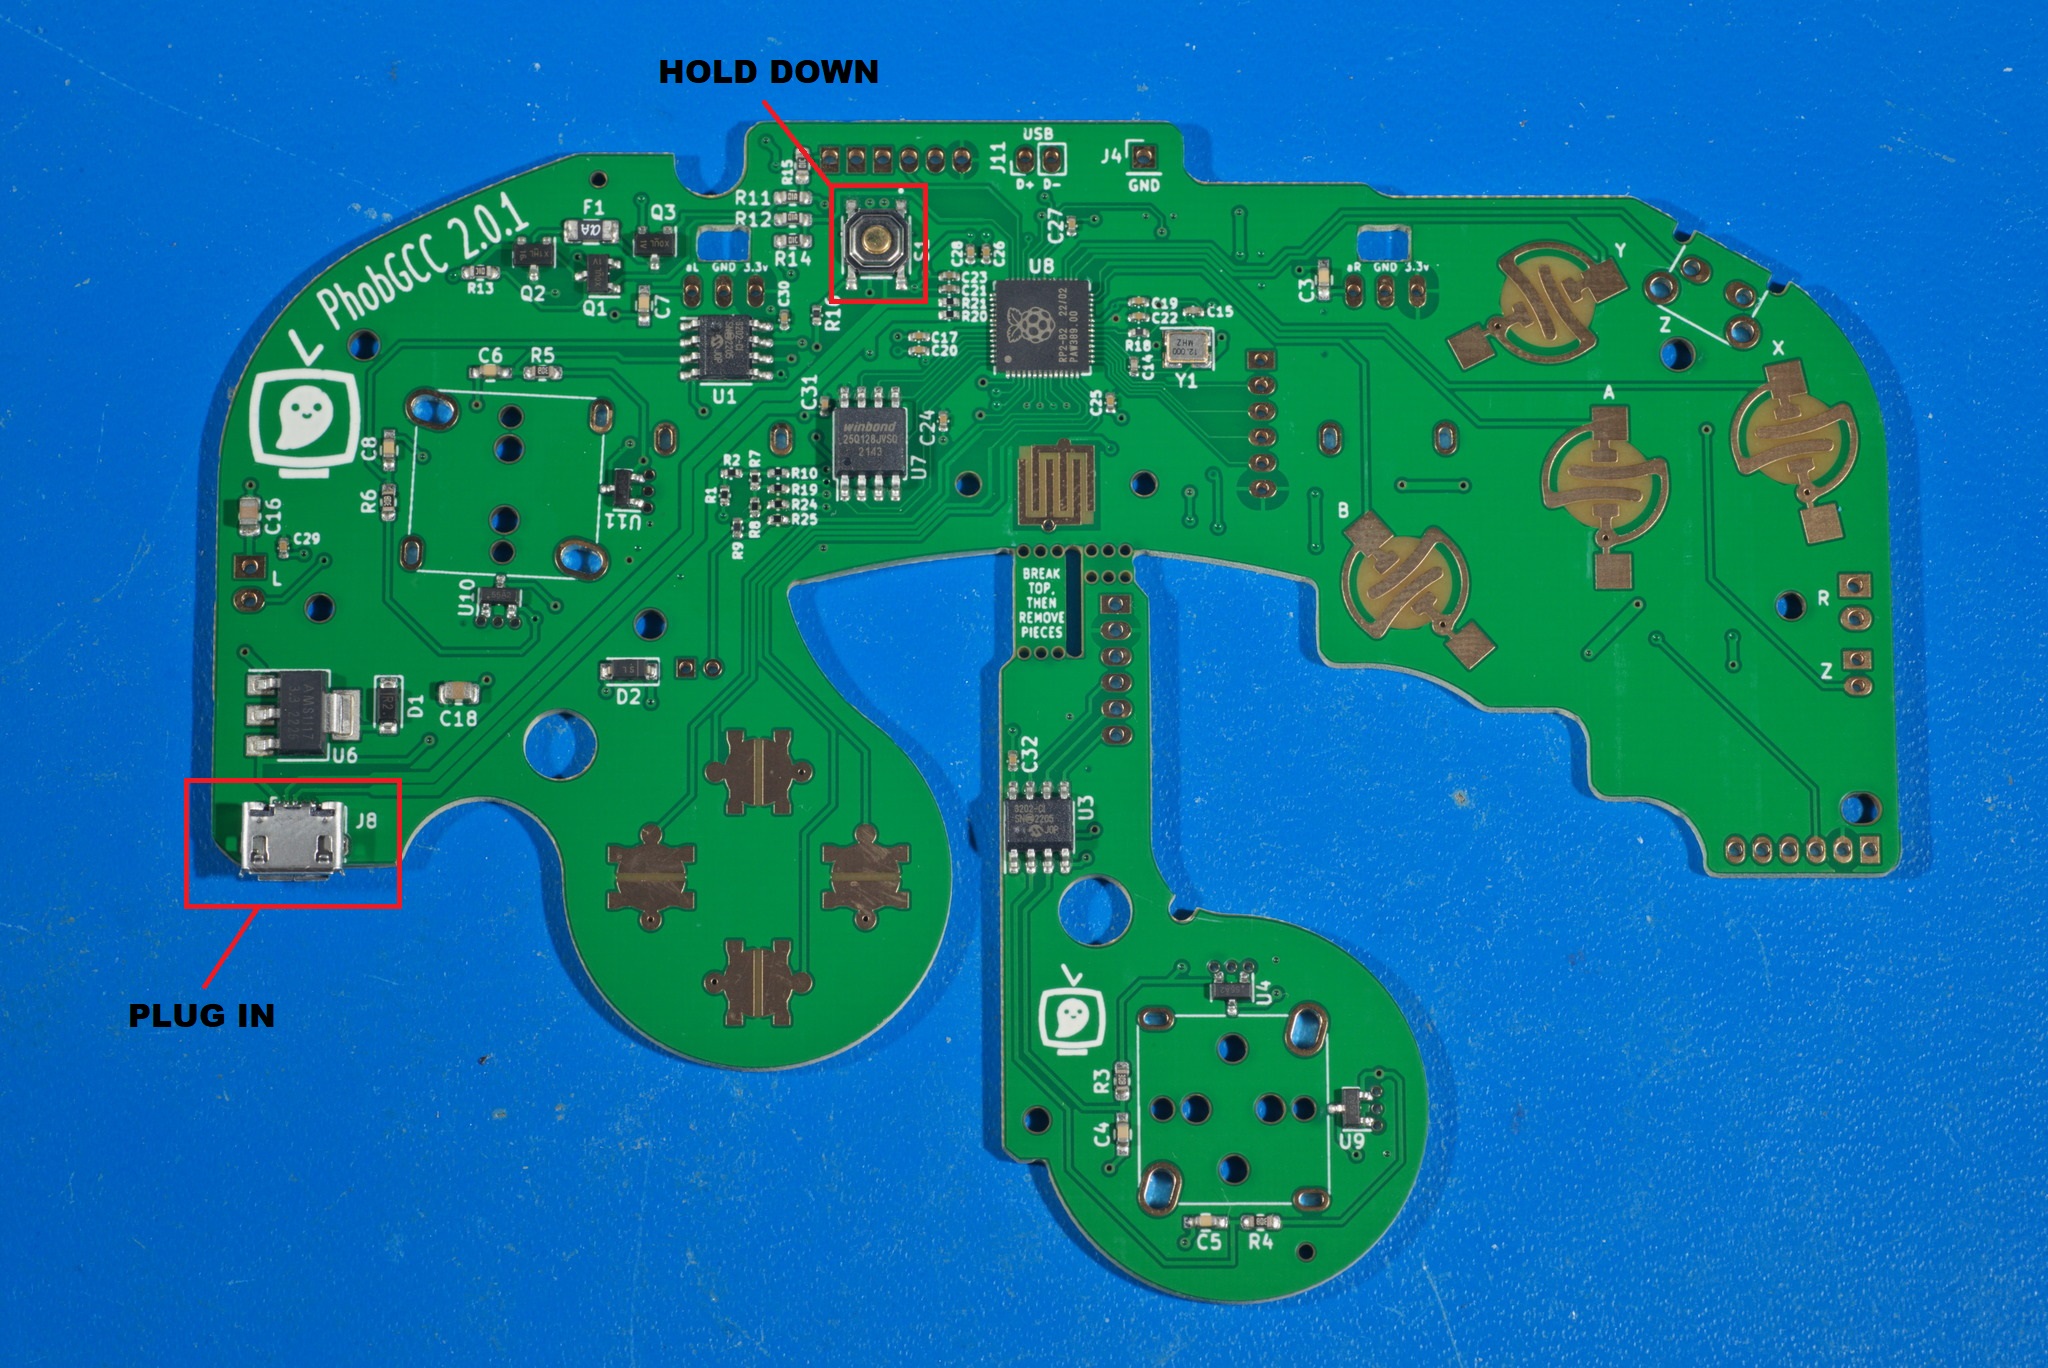
Move the .uf2 file to somewhere you can easily find it. Then unplug your controller from the adapter or console it is connected to, hold down the button on the front of the board, and plug the controller in as shown below:
NOTE: It is easier to plug in Micro-USB first and then hold the button and plug in USB-A on your computer
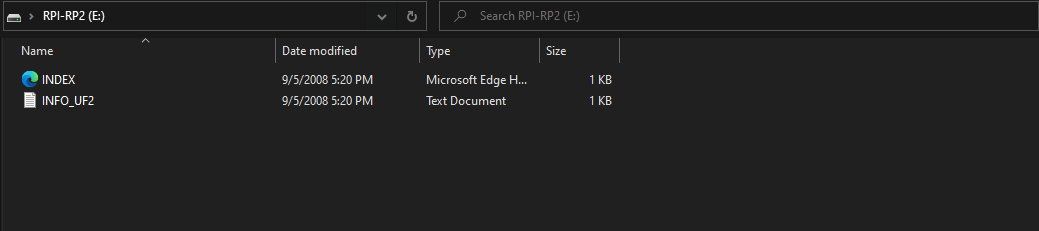
You should have it appear as a mass storage device, similar to a flashdrive. Drag the .uf2 file onto the controller.
Once the transfer is finished, the USB mass storage device will automatically disconnect. If you re-connect it, the .uf2 file will not appear to be there. This is normal.
Once this is complete, you can unplug your PhobGCC and reassemble the controller. Continue to the calibration guide.
Troubleshooting
Controller not accepting any commands
Should the controller not be accepting any commands, there is a chance that the flash may have come with garbage data and it may be messing the controller up. Follow the steps below:
- Download This file.
- Flash that file onto your PhobGCC v2, and don’t disconnect the Micro-USB cable. After about 10 seconds, It’ll reconnect as a mass storage device again.
- Flash the normal firmware and proceed with calibration.
For all other issues, please refer to the PhobGCC Discord’s tech support. PhobGCC Discord